
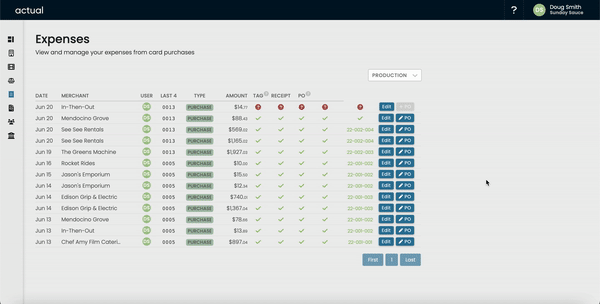
Mapping Expenses


We're pumped to announce our latest cross-platform feature : Expense Mapping.
We developed this upgrade based on customer feedback asking our team to continue to build bridges across features. The goal was simple, improve workflow and minimize the time loss of manual expense tracking and logs.
So here's how it works:
- Select Expenses from the Side-Bar Navigation
- Select and log an expense (line item, and receipt) like you're used to.
// this is where the upgrade starts >>
- Click the 'Edit PO' button in the expense row.
- You'll see two options:
Option 1 : Create New PO
- Choose "Vendor" or "No Vendor"
- Vendor - following this route, you'll have the option of searching for an existing vendor within your company database, or you can create a new vendor from scratch.
- No Vendor - Think of this as a slush account. Small transactions similar to how you might have a petty cash envelope. In this scenario, we create a PO for the payment card itself (using the card identifying information, like Card # & User as the description).
Option 2 : Add to Existing PO
- Following this route, you can add expenses to an existing Purchase Order. As an example, let's assume your team is working with a vendor, call them "Green Machine". At the start of the job you might create the PO for that vendor. Throughout the run of the job, you'll likely incur several card charges from that account. In this scenario, your team can map all relevant charges directly to that purchase order.
Have a question? Connect with us in our Slack Community for real time customer support with the Actual team.